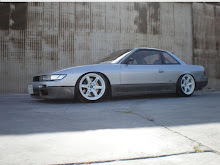
Wednesday, January 20, 2010

ETS Wonder Knuckles

Ive personally spent all of year 2009 fabricating knuckles for myself and friends to try out on the track, these have been a huge success and one im going to continue to do in the future. Ive done well over 20 different designs and angles, ive tested 12 myself this year with brilliant results, they range from mild to wild and can be made to your specifications. I do Toyota AE86, Nissan Silvia/180SX S13/S14/S15 Nissan Skyline R32/R33/R34 but not GTR.

Heres a quick run down on the benifits of doing this modification

• Decreasing ackerman angle gives the biggest adavantage to a drift car. What this does is the less ackerman you run the straighter the front wheels will be in relation to each other. In a normal Knuckle setup the front wheels on full lock are toeing out by massive amounts, by changing the mounting point on the knuckle we decrease the toe out and it brings the mid corner speed, front end grip and rear end drive up a lot.
• Increasing lock is what everyone in the drift world wants to do, the more lock you have the less chance you have of spinning. By shifting the mounting point of the tie rod end to the knuckle out further to decrease ackerman you are instantly increasing lock as the knuckle rotates further around before it hits the lock stop.
• Decreasing bump steer at the same time as decreasing your ackerman is a logical step. On my knuckles I lower the tie rod mounting position on the knuckle 35mm, this brings the tie rod a lot straighter on a lowered car than it would with a factory knuckle meaning bump steer effect will be lessened.
• Quick steering is incorporated into the modified knuckle design, the distance between the tie rod mounting point and the lower ball joint swivel point on your Lower Control Arm is made shorter making for less leverage and more input from the steering wheel. A factory knuckle may measure around 3-3.5 turns lock to lock whereas a modified knuckle like mine gives you around 2 turns lock to lock, this makes it a lot easier to trace the wheel and make minute adjustments to angle mid corner, it makes drifting a lot easier on the driver. Another benefit to this is the decreased rack travel, there's no longer any need to add rack spacers as your rack will never bottom out because of the increased ratio.
• An added bonus is the harder steering feel associated with the shorter distance between the tie rod mounting point and the lower ball joint swivel point, often S series nissans have a very light steering wheel making it hard for the driver to get a good feel on what the front wheels are doing. The less leverage the knuckle now has on the steering rack because of the modified knuckle makes the feeling of the steering a lot more user friendly
• To sum it up, modified Knuckles and drift cars go hand in hand, bang for buck modifactions on drift cars don’t come much better than these.
• Please note: improper welding and preparation may put your life at risk, only trust people who are qualified and carry the proper certification for such jobs.


Sunday, December 13, 2009

Z32 300ZX Gearbox Conversion kit for SR20

These gearboxs were ran on the Z32 300zx ranging from 1989 to 2000, dont be fooled the non turbo gearbox is the same unit as the turbo gearbox just with slight changes that do no effect the conversion. The gearing characteristics are very similar to SR20 gearing, the only slight difference is the 5 th gear on the VG box is taller than the SR 5th gear so top speed is with a VG box is a little higher.


The gearbox: When shopping for a Z32 gearbox try and look for a clean complete unit, you need the speedo sender, shifter, shifter linkage, front half of the tailshaft (the yokes are availiable new so dont stress about this), clutch slave cylinder (as the line sits higher which is an advantage for low cars) throwout bearing retainer and fork. I have done a lot of conversions in my time and never come across any more damage than a slightly worn 4th gear syncro, even the dirtiest old looking gearboxs have been brand new internally.

The parts:


^^ White gearbox mount not included

Adapter plate: This is used to change the mounting pattern on the SR block, its 12mm Aircraft Alluminium water jet cut and prescision CNC milled, it covers 3/4 of the ring of the bellhousing and bolts to the block using 6 12mm countersunk screws and 2 dowel positions. This bolts on over the factory bellhousing "washer" so theres no need to remove it.

There is also a provision for the starter motor to mount to the adapter plate so it is always on the motor dosnt matter if gearbox is on or off.

Gearbox crossmember: A 3mm steel laser cut blank folded, jigged and welded to fasten the gearbox in the correct position, you will be using a factory gearbox mount aswell(nismo hard rubber version works best)

Shifter mount: From factory the Z32 had a shifter that was actually mounted to the floor, so for our S series nissans we need a bracket that mounts the shifter by itself on the gearbox. A laser cut 3mm steel folded and jigged bracket takes car of this to mount everything at the correct hight.

Alloy cover plate: A simple 3mm thick alloy cover plate that covers the factory shifter hole so no noise dirt or rats get inside your car.

Gearbox modifications: The bellhousing needs to be removed from the gearbox, this is essential to machine the face on the bellhousing to allow the 12mm thick adapter plate to sit inside it. While its being machined the dowel holes need to be opened up to suit the 16mm dowells in the adapter plate and one whole on the LH side needs opening up to allow the stud to come through it.


The conversion: Basically its a bolt on affair after all the maching and products have been purchased, the bellhousing goes back onto the gearbox, the shifter mount bolts to the gearbox, the gearbox mount bolts to the gearbox, the crossmember bolts to the gearbox mount, the shifter bolts to the shifter mount, the adapter plate bolts to the motor then the gearbox bolts to the adapter plate. The starter motor will need to be removed and the two mounting holes drilled out to 10.5 mm to allow the bolts to pass through it instead of threading into it. Bolt the starter motor to the adpater plate and plug the wires back on to it.

By now it will be looking like a complete unit, you will notice i didnt mention anything about modifying a clutch, thats because you dont have to, the input shaft is excactly the same as an SR one, so you can retain your clutch for this modification.

The tailshaft is best left as a two piece unit, you take the two front halves of each tailshaft SR and VG, cut the rear yoke of the sr, cut the front yoke off the VG and retube them to the length you need, the three S13, S14, S15s all share different lengths so its best to do the tailshaft last so you can get this part right. You will be adding somewhere in the vacinity of 100mm as the VG box is shorter than the SR one.

Car modifications: The tunnel on all SR equipped cars is large enough to take a VG box, no modifications are needed for this, the shifter however needs a "half circle" cut into the body to allow it to sit 75mm further back and 35mm further left than the factory SR shifter. This is best done with the gearbox in the car and the shifter removed as many cars positions differ.
Hope this sums up the conversion and please ask if you have any further questions. I have been personally running this setup for 5 years now and had no issues whatsoever.